How to Craft the Perfect Berserker Armor Breastplate: Step-by-Step Leatherworking Guide
In this step-by-step guide from Prince Armory Academy, you’ll learn how to craft a stunning leather breastplate as part of our custom Berserker Armor series. This tutorial covers everything from choosing the ideal 9-10 oz vegetable-tanned leather to precise cutting, shaping, and intricate tooling techniques inspired by manga designs. Learn tips for dyeing, using tools like an embossing mill for detailed patterns, and finishing with a durable Tough Coat for long-lasting wear. With clear assembly instructions, including how to add straps, buckles, and rivets, this guide will equip both beginners and advanced leatherworkers to create beautiful, functional armor. Join our community for additional resources, and start crafting your own masterpiece today!
The Recap Below Has Been Generated With AI
Welcome to Prince Armory Academy! In this in-depth tutorial, we’ll walk you through the process of finishing the Berserker Armor and transforming the leather breastplate into a stunning piece of functional art. Whether you’re a beginner or a seasoned armor maker, this guide will provide valuable tips and techniques that you can use in your own projects.
Introduction to the Berserker Armor Project
If you’re new to the Prince Armory Academy, we’re thrilled to have you! This post is part of an ongoing series where we share detailed instructions on how to build high-quality armor. Today, we’re focusing on crafting the Berserker Armor — a design inspired by manga references, featuring intricate detailing and durable craftsmanship. Let’s dive right into the steps you need to follow to create your own stunning piece of leather armor.
The Leather: Choosing the Right Material
For this project, we’ve chosen Weaver Select Vegetable-Tanned Leather (9-10 oz, approximately 4mm thick). This leather is a great choice for armor because it strikes a balance between durability and workability, offering both strength and comfort for long-term wear.
Vegetable-tanned leather is perfect for armor-making because it holds its shape without being too stiff or flimsy. For a lightweight yet sturdy finish, this leather is ideal. Pro Tip: When selecting leather for armor projects, always choose medium-weight leather (around 4mm) to ensure it provides enough structure while being comfortable.
Preparing the Leather: Trimming and Cutting
Start by laying out your leather and trimming away any rough edges. This step is crucial to prepare the material for cutting and ensures that you don’t waste any usable leather.
For cutting, you have two options:
Manual Cutting: If you’re cutting by hand, you can print out the patterns in PDF format and trace them onto your leather.
Laser Cutting: If you have access to a laser cutter (like the Aeon Laser Nova 16), you can save time and ensure precision by using SVG files included with the patterns. Laser cutting is a game-changer, making repetitive cuts easy and precise, especially on larger sections of hide.
After cutting, use a wet sponge to dampen the leather. This helps relax the fibers, making the material easier to shape and tool. Keep the leather moist but not soaking wet for the best results.
Tooling and Embossing the Leather
The next step in creating the Berserker Armor is tooling the leather to achieve the intricate details that give it its signature look. We’ve added striations across the armor, inspired by manga designs. If you’re looking for added comfort during the tooling process, try wrapping your modeling tool with some adhesive bandage wrap.
If you’re working with a large number of raised areas (like the fluted details on this armor), it might be tempting to use hand tools for everything. However, to save time and effort, we designed a custom embossing mill to help achieve 95% of the fluting details.
Still, some areas will require hand finishing, especially those you can’t reach with the embossing wheel. Advanced Tip: Whether you’re using a mill or hand tooling, learning how to flute leather is a skill that will be beneficial for many future builds, including advanced projects.
Shaping the Leather for Maximum Durability
One of the most important aspects of armor-making is shaping the leather to create a form-fitting and durable piece. Leather that is not shaped properly will lack rigidity and won’t look as professional. To achieve this, ensure you are forming the leather to fit your body’s contours while maintaining comfort.
When the leather is properly shaped and dried, it will hold the form and add to the rigidity of the armor. This shaping process is essential to creating pieces like the breastplate, which needs to be contoured to provide protection and comfort while still looking visually appealing.
Dyeing and Finishing: Bringing Your Armor to Life
Before assembling the pieces, we suggest dyeing the leather. For this build, we used Phoebe’s Pro Dye, which contains a bit of oil to keep the leather from drying out too much. Pro Tip: Be prepared for a mess when dyeing leather. To help manage the mess, use dye trays (available on Amazon) to set your pieces to dry.
Once the pieces are dried, we’ll finish them with Weaver’s Tough Coat. This acrylic finish adds an extra layer of durability to your leather armor, making it more resistant to wear and tear. Leather armor needs to be hardened, and using Tough Coat or soaking the pieces in finish will help them retain their shape over time.
If you want a quicker dry time or prefer a matte finish, you can use a scuffing pad to reduce the gloss. Quick Tip: Use an orbital sander (like the Milwaukee Orbital Sander) to speed up the finishing process for larger pieces.
Assembling the Berserker Armor
Once the leather is finished, it’s time for assembly. Start with the front breastplate and work your way up from the bottom. Be sure to follow the numbered reference marks on each piece, which will help you avoid confusion. Retainer straps are used to hold everything in place, and for this build, we used 3-4oz leather for the straps to allow some freedom of movement without causing sagging over time.
You’ll need to use rivet techniques for strong connections. For flexible parts, like areas that need to articulate, Chicago screws are ideal. This provides you with the option to remove or adjust components in the future.
Final Touches: Adding Detail and Functionality
The last steps include adding the tassels and buckles to the armor. These components are crucial for both the look and functionality of the armor. The backplate features small buckle straps for easy adjustments, and the front is equipped with snaps for secure closure.
If you’re looking for more details on buckle-making, check out our free pattern set and dedicated video focused on buckles and straps. The final touches will elevate your Berserker Armor, making it not only functional but visually striking as well.
Conclusion: Ready to Build Your Own Berserker Armor?
Building your own Berserker Armor requires patience and dedication, but the results are worth it! Whether you’re crafting for cosplay, reenactment, or just for fun, the techniques shared here will help you make armor that is both beautiful and durable.
For those new to armor-making, we recommend starting with one of our beginner-friendly Warrior Fantasy Series projects before diving into this advanced build. We’ve designed these simpler projects to help you master the basics of leatherworking before taking on more complex builds like the Berserker Armor.
Join Our Community for More Tips and Tutorials
If you have any questions, feel free to join our Discord community, where we offer support and guidance for armor makers at all skill levels. Don’t forget to check out the
Prince Armory Academy for more detailed tutorials and pattern bundles!
SEO Keywords: Berserker armor, leather armor making, leatherworking tips, Prince Armory Academy, leather armor tutorial, armor crafting techniques, crafting leather armor, Berserker armor tutorial, leather dyeing, leather tooling, how to make armor, armor crafting tools, vegetable-tanned leather, embossing mill for leather, leatherworking tools, leatherworking beginners.
-
Sale!
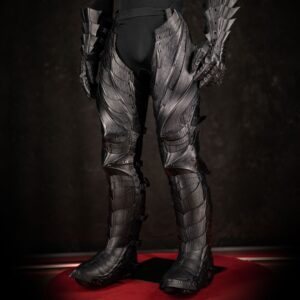
Berserker Leg Patterns
Rated 0 out of 5$99.00Original price was: $99.00.$69.30Current price is: $69.30. -
Sale!
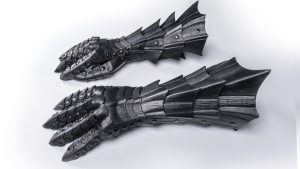
Berserker Gauntlets Patterns
Rated 0 out of 5$75.00Original price was: $75.00.$52.50Current price is: $52.50. -
Sale!
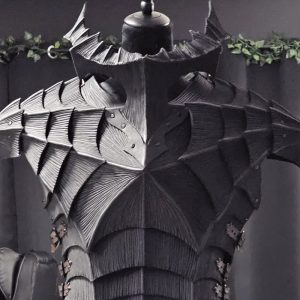
Berserker Breastplate Pattern
Rated 0 out of 5$99.00Original price was: $99.00.$69.30Current price is: $69.30. -
Sale!

- Select options This product has multiple variants. The options may be chosen on the product page
Berserker Skull Helmet Pattern
Rated 5.00 out of 5 based on 1 customer rating$24.50 – $56.00 -
Sale!
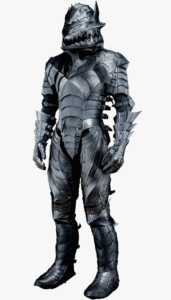
Berserker Bundle (NEW!)
Rated 4.92 out of 5 based on 13 customer ratings$650.00Original price was: $650.00.$209.30Current price is: $209.30.

